Guided Example
To begin image processing:
Navigate to the top left of the screen and click File.
Then select Begin Image Processing.
Once a popup has appeared:
Select File in the first row labeled “Select BSA Image”, navigate to the directory of your image folder and select the BSA image.
Select File in the second row labeled “Select PostB Image” from the same image folder, and select the PostB image.
Enter the unique ID you want associated with this particular run.
Once entered select Submit at the bottom of the pop-up window. Now the BSA image should be displayed in the browser, as shown below.
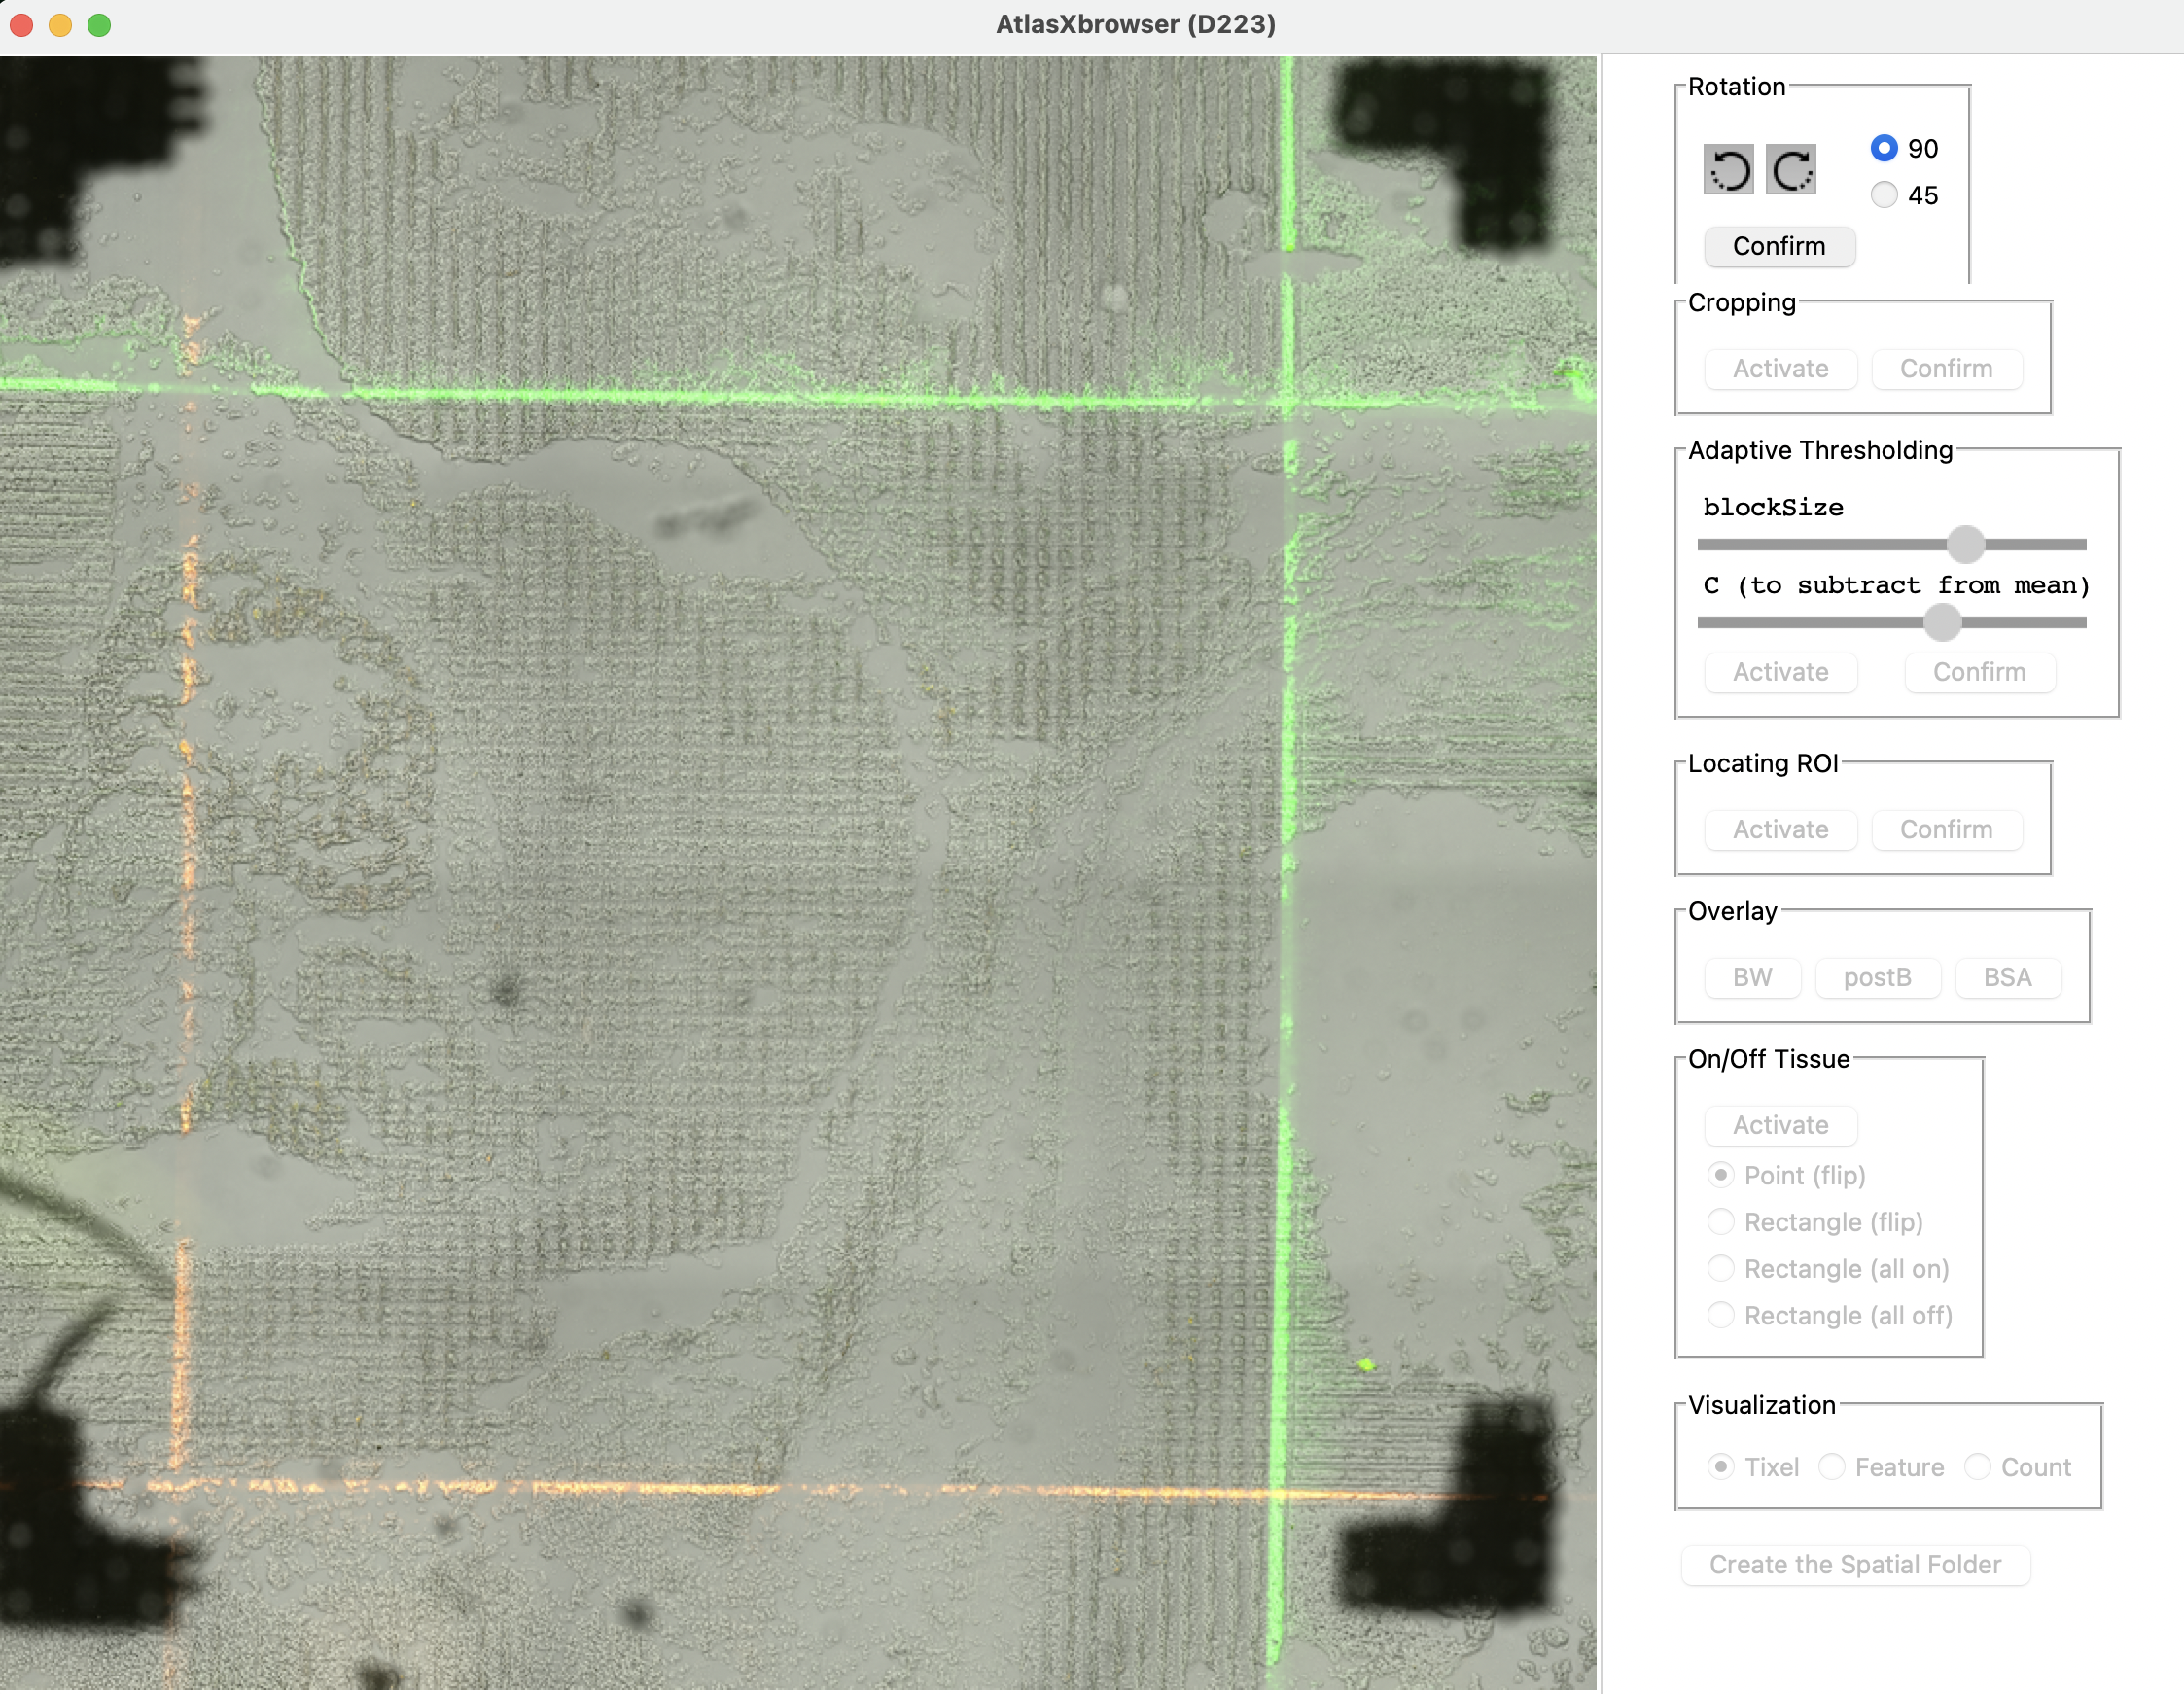
Once the BSA image is loaded on the screen the image can be rotated as desired. This particular image does not require rotation however there is no harm in using the rotation buttons as the image can always be re-oriented to its origin.
Following rotation, the image must be cropped. Activate cropping by selecting Activate within the Cropping section in the top right of the screen.
Drag the corners of the square to include the entire Region of Interest, defined by the fluorescently stained BSA lines.
The cropping box has been expanded to include the entire ROI.
Once the cropping square has been stretched to include the ROI, including some extra buffer room, select Confirm within the Cropping tab.
Once the image is rotated and cropped as desired, proceed to the pixel thresholding step by selecting Activate under the Adaptive Thresholding tab.
Use the sliders labeled blocksize and C to create the maximal gradient between the light and dark sections of the image. Experiment with different values of the sliders to see how high and low values of each affect the image.
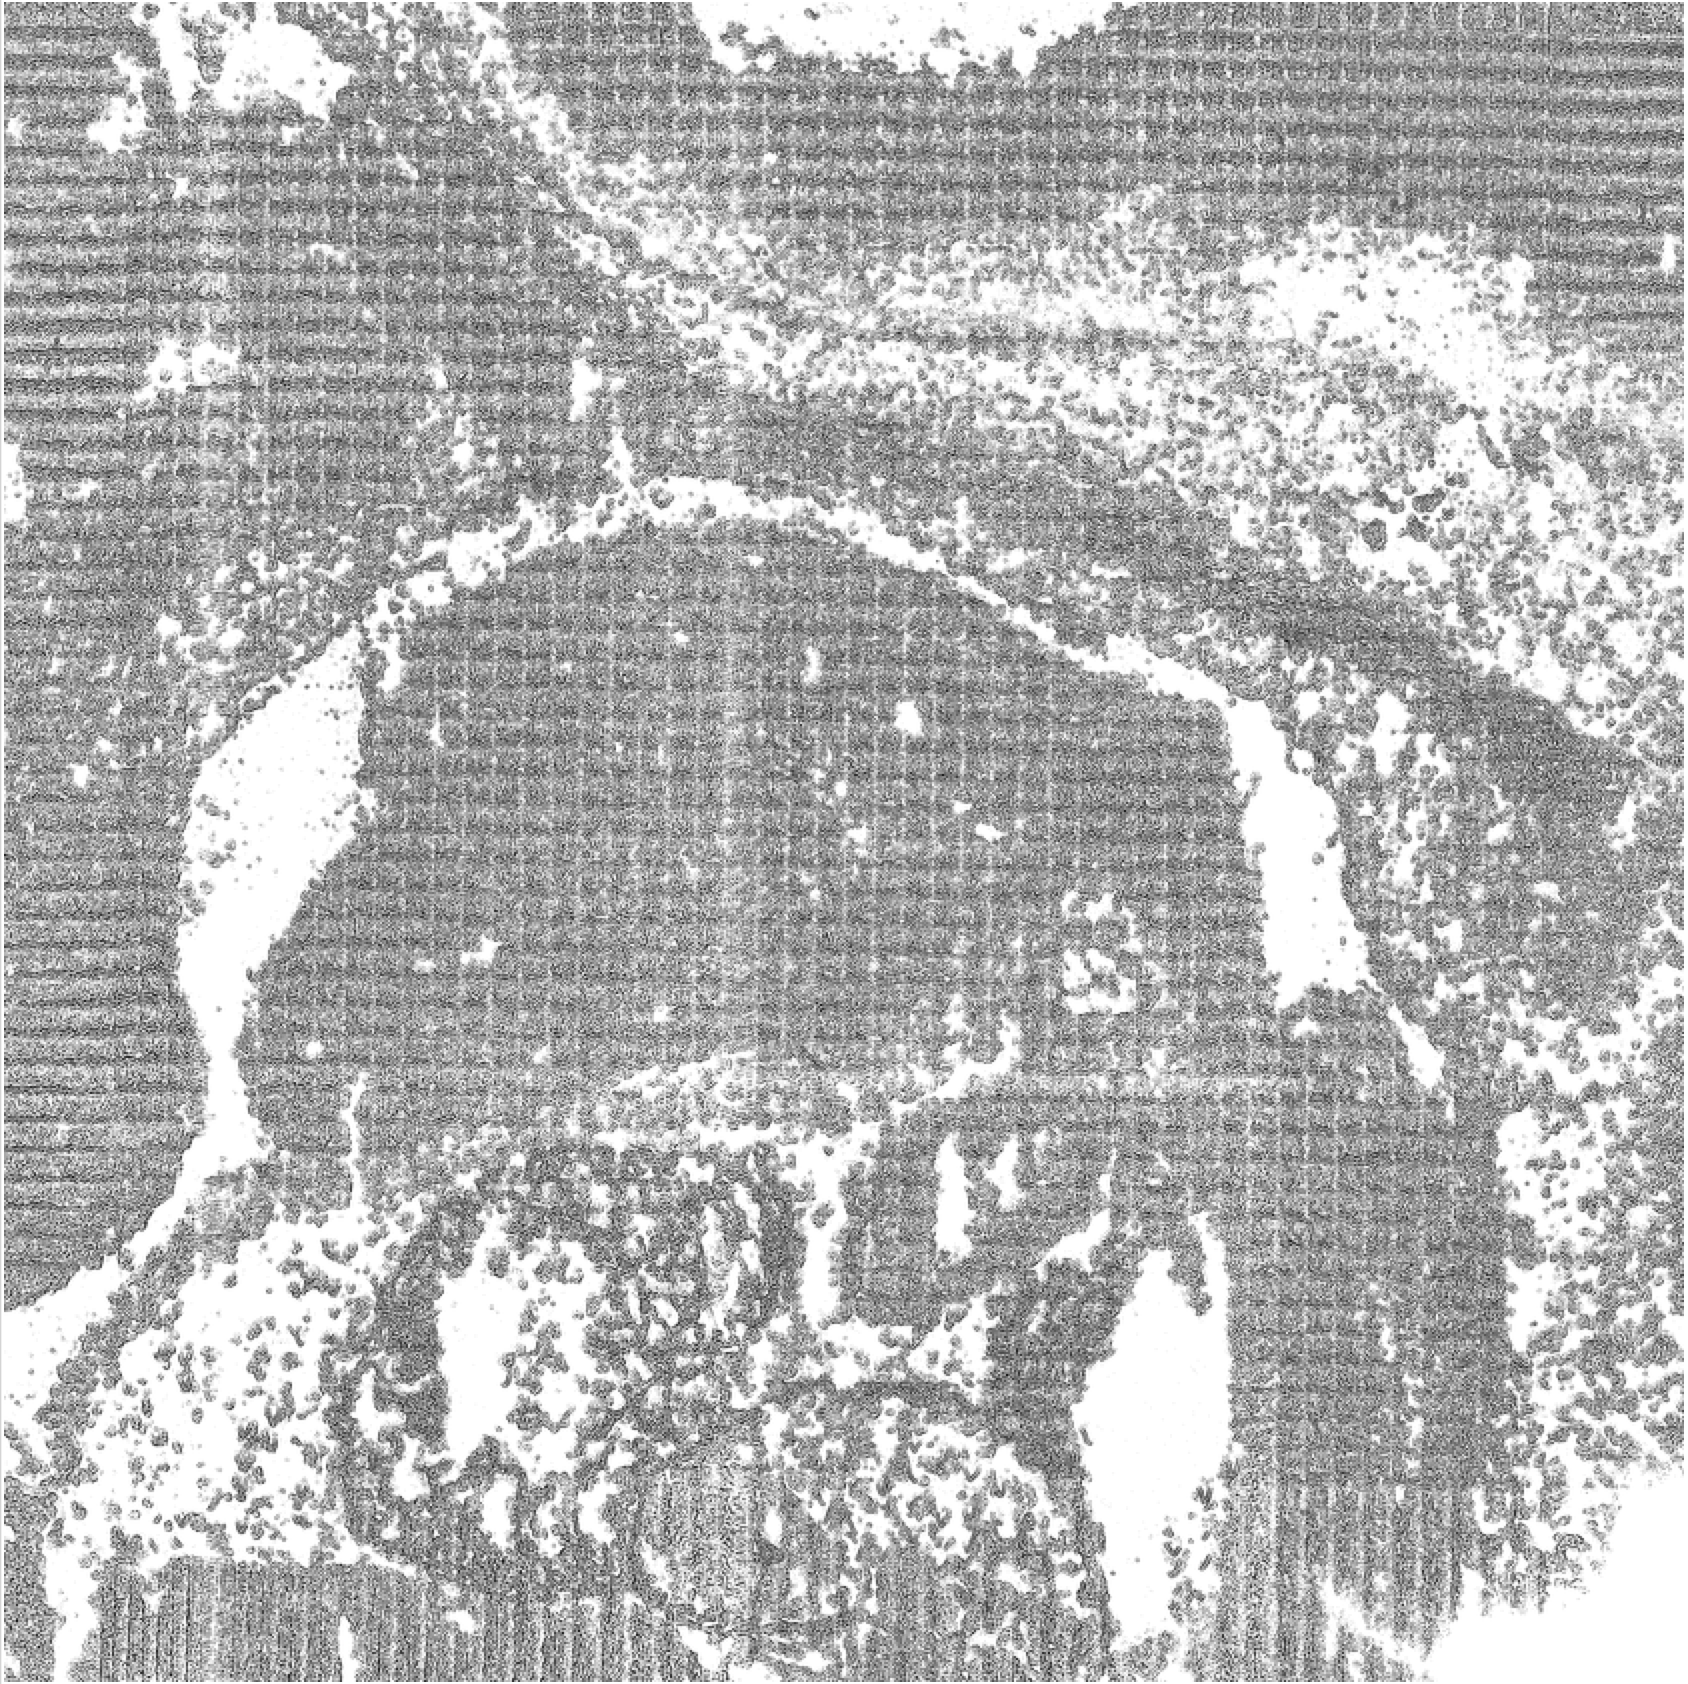
This is an example of blocksize and C settings which produce good contrast within the image.
Once the sliders under the Adaptive Thresholding tab have been configured, and there is high contrast between the light and dark regions of the image, select Confirm, within the same Adaptive Thresholding window.
Begin the process of ROI location by selecting Activate, under the Locating ROI tab.
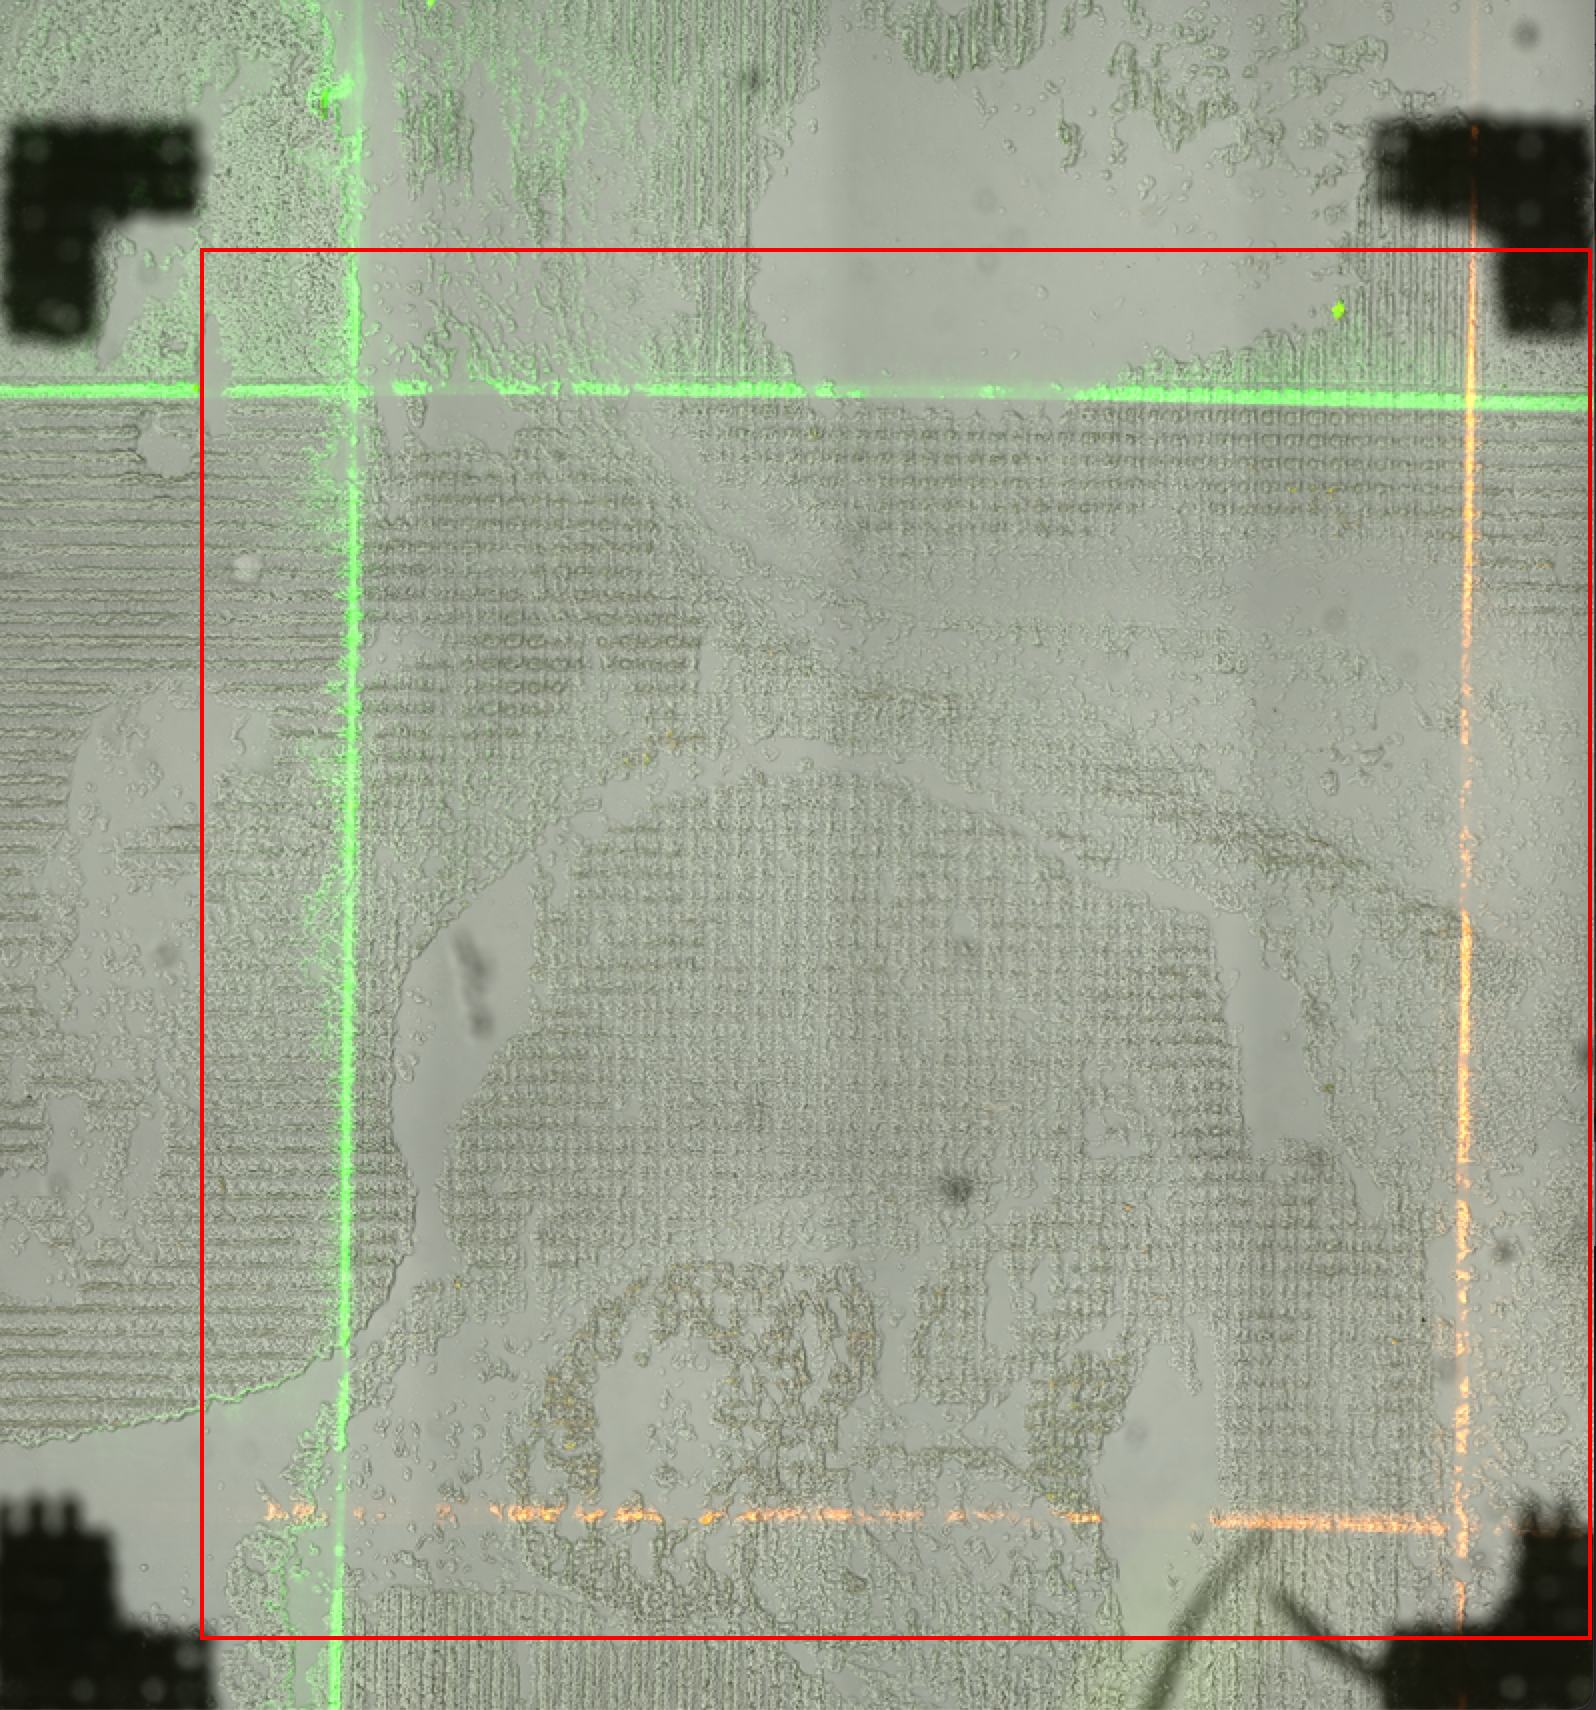
Unlike when cropping the image previously, here we must be precise about the determination of the ROI. Drag the red rectangle to the borders of the ROI, created by the BSA staining on the image.

To identify the ROI, the user must drag the corners of this red square to the outside of the fluorescent lines.
Note: The dye is being run through channels of the chips, and as such must be included within this rectangle. The optimal placement of this rectangle is directly on the outside borders of the channels containing the BSA staining.
This is a properly placed box, notice how it includes the channels containing the BSA staining.
Once the rectangle is lined up to the ROI, select Confirm under the same Locating ROI tab.
To check whether the ROI specified in the previous step is valid, we can view how the tixels corresponding to this ROI align with the image.
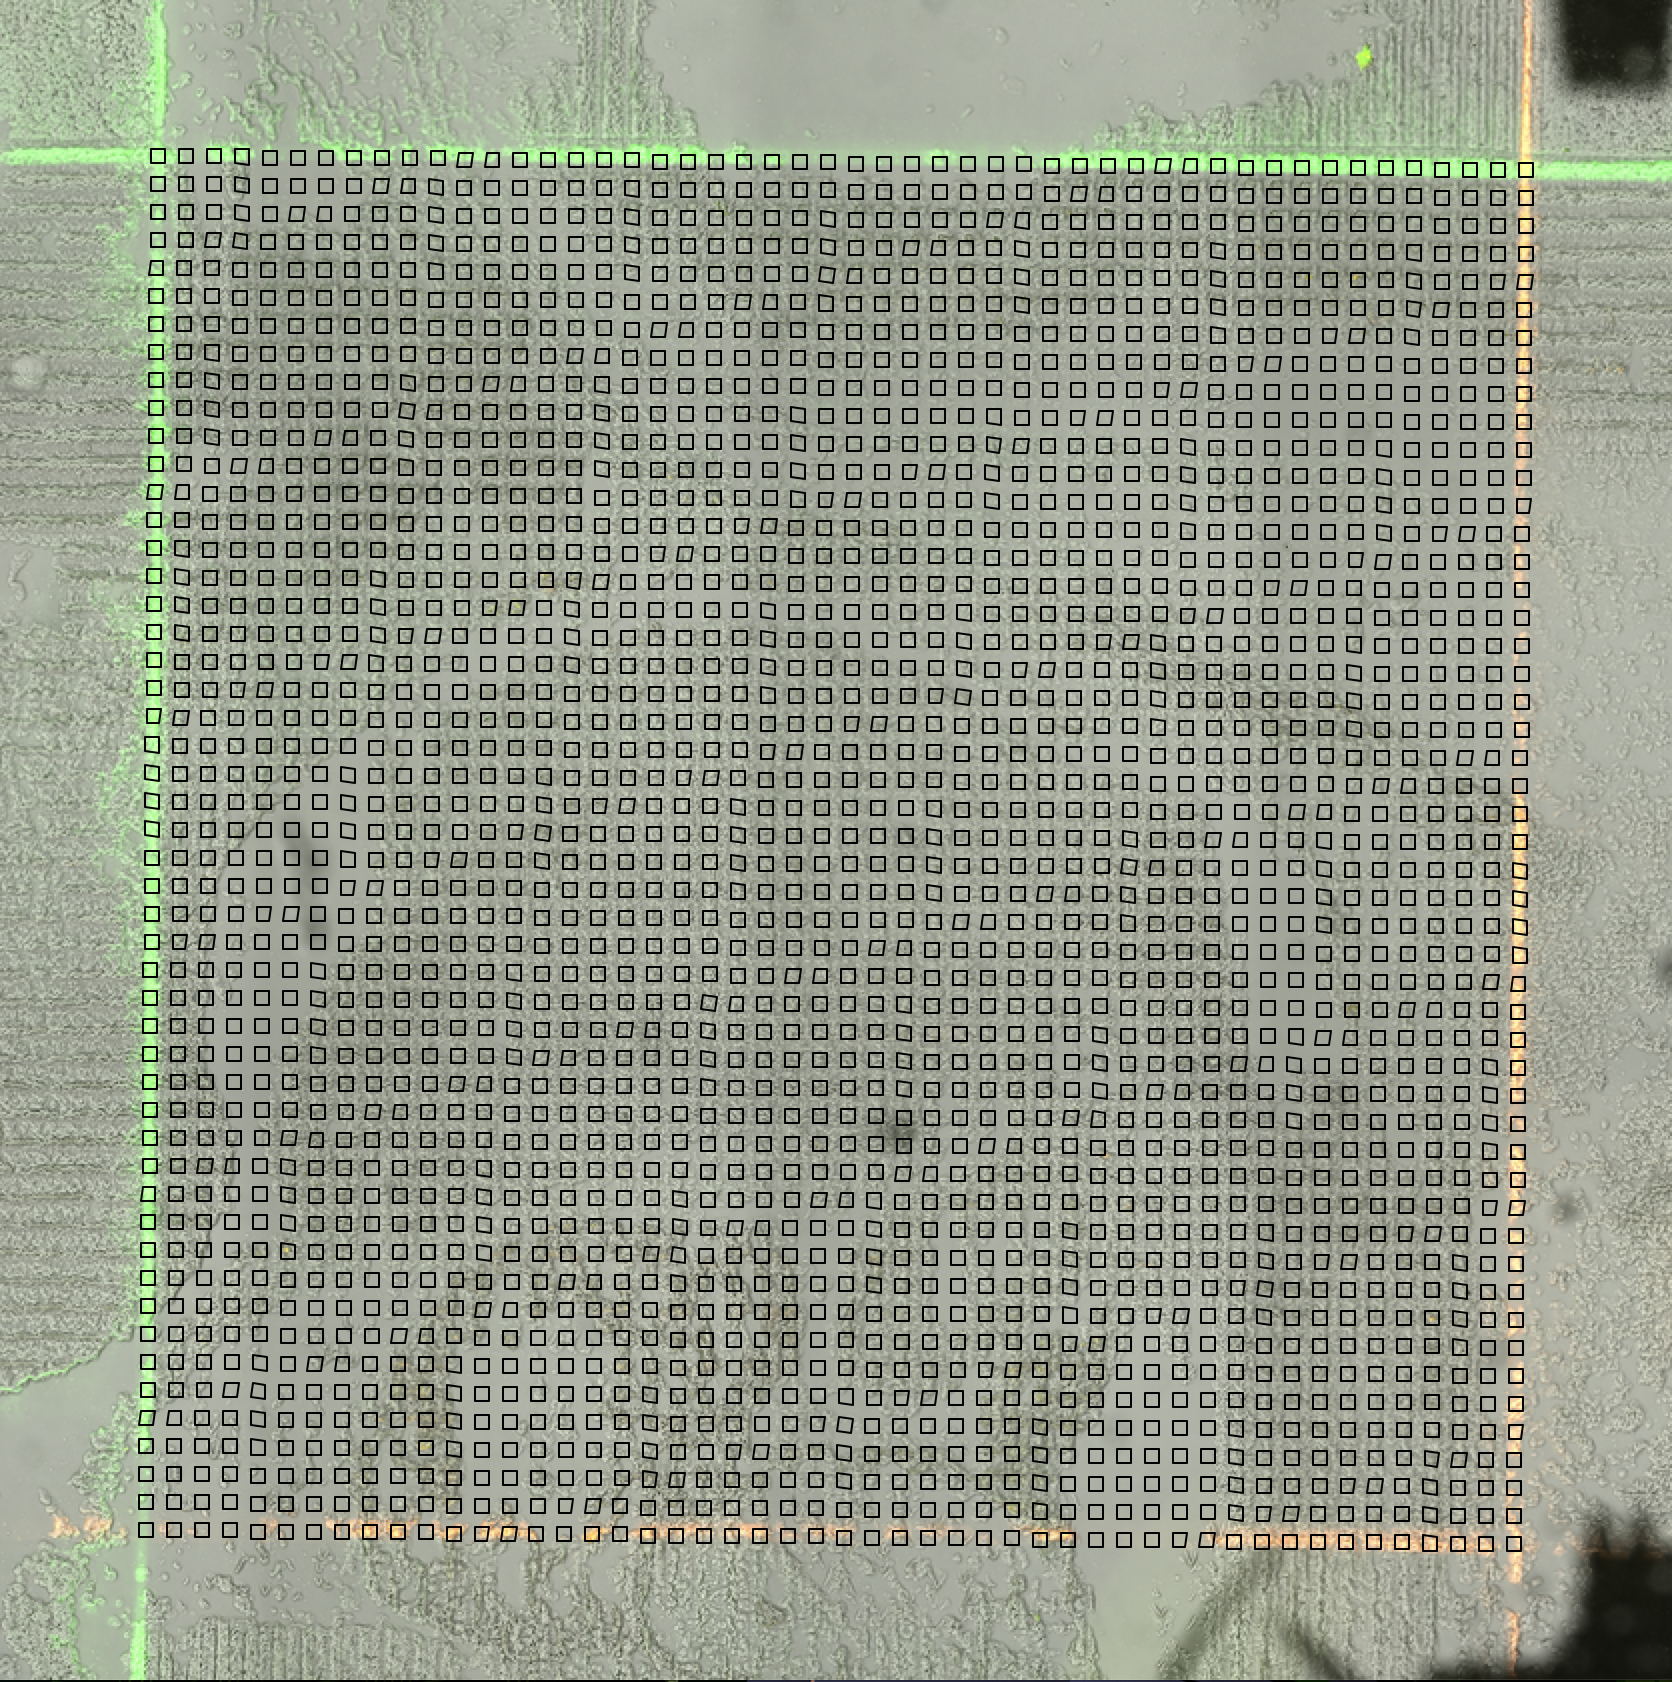
Under the Overlay tab on the right side of the screen, select BSA. This displays in the browser the hypothetical aligned on the BSA stained image.
Check to ensure that the tixels on the outer channels of the image, both horizontal and vertical, align with the BSA staining.
If the tixels are not aligned, navigate to the Locating ROI tab and re-select Activate to allow for edits to the chosen ROI region.
Within the Overlay tab, there is also a button labeled Tixels. This allows the tixels to be displayed over the thresholded image.
Once it has been confirmed that the tixels are properly aligned to the BSA channels, select Activate under the On/Off Tissue tab.
At this point, the thresholded image overlaid with the tixel grid should be displayed on the screen. The tixels should either be filled in red or remain clear.
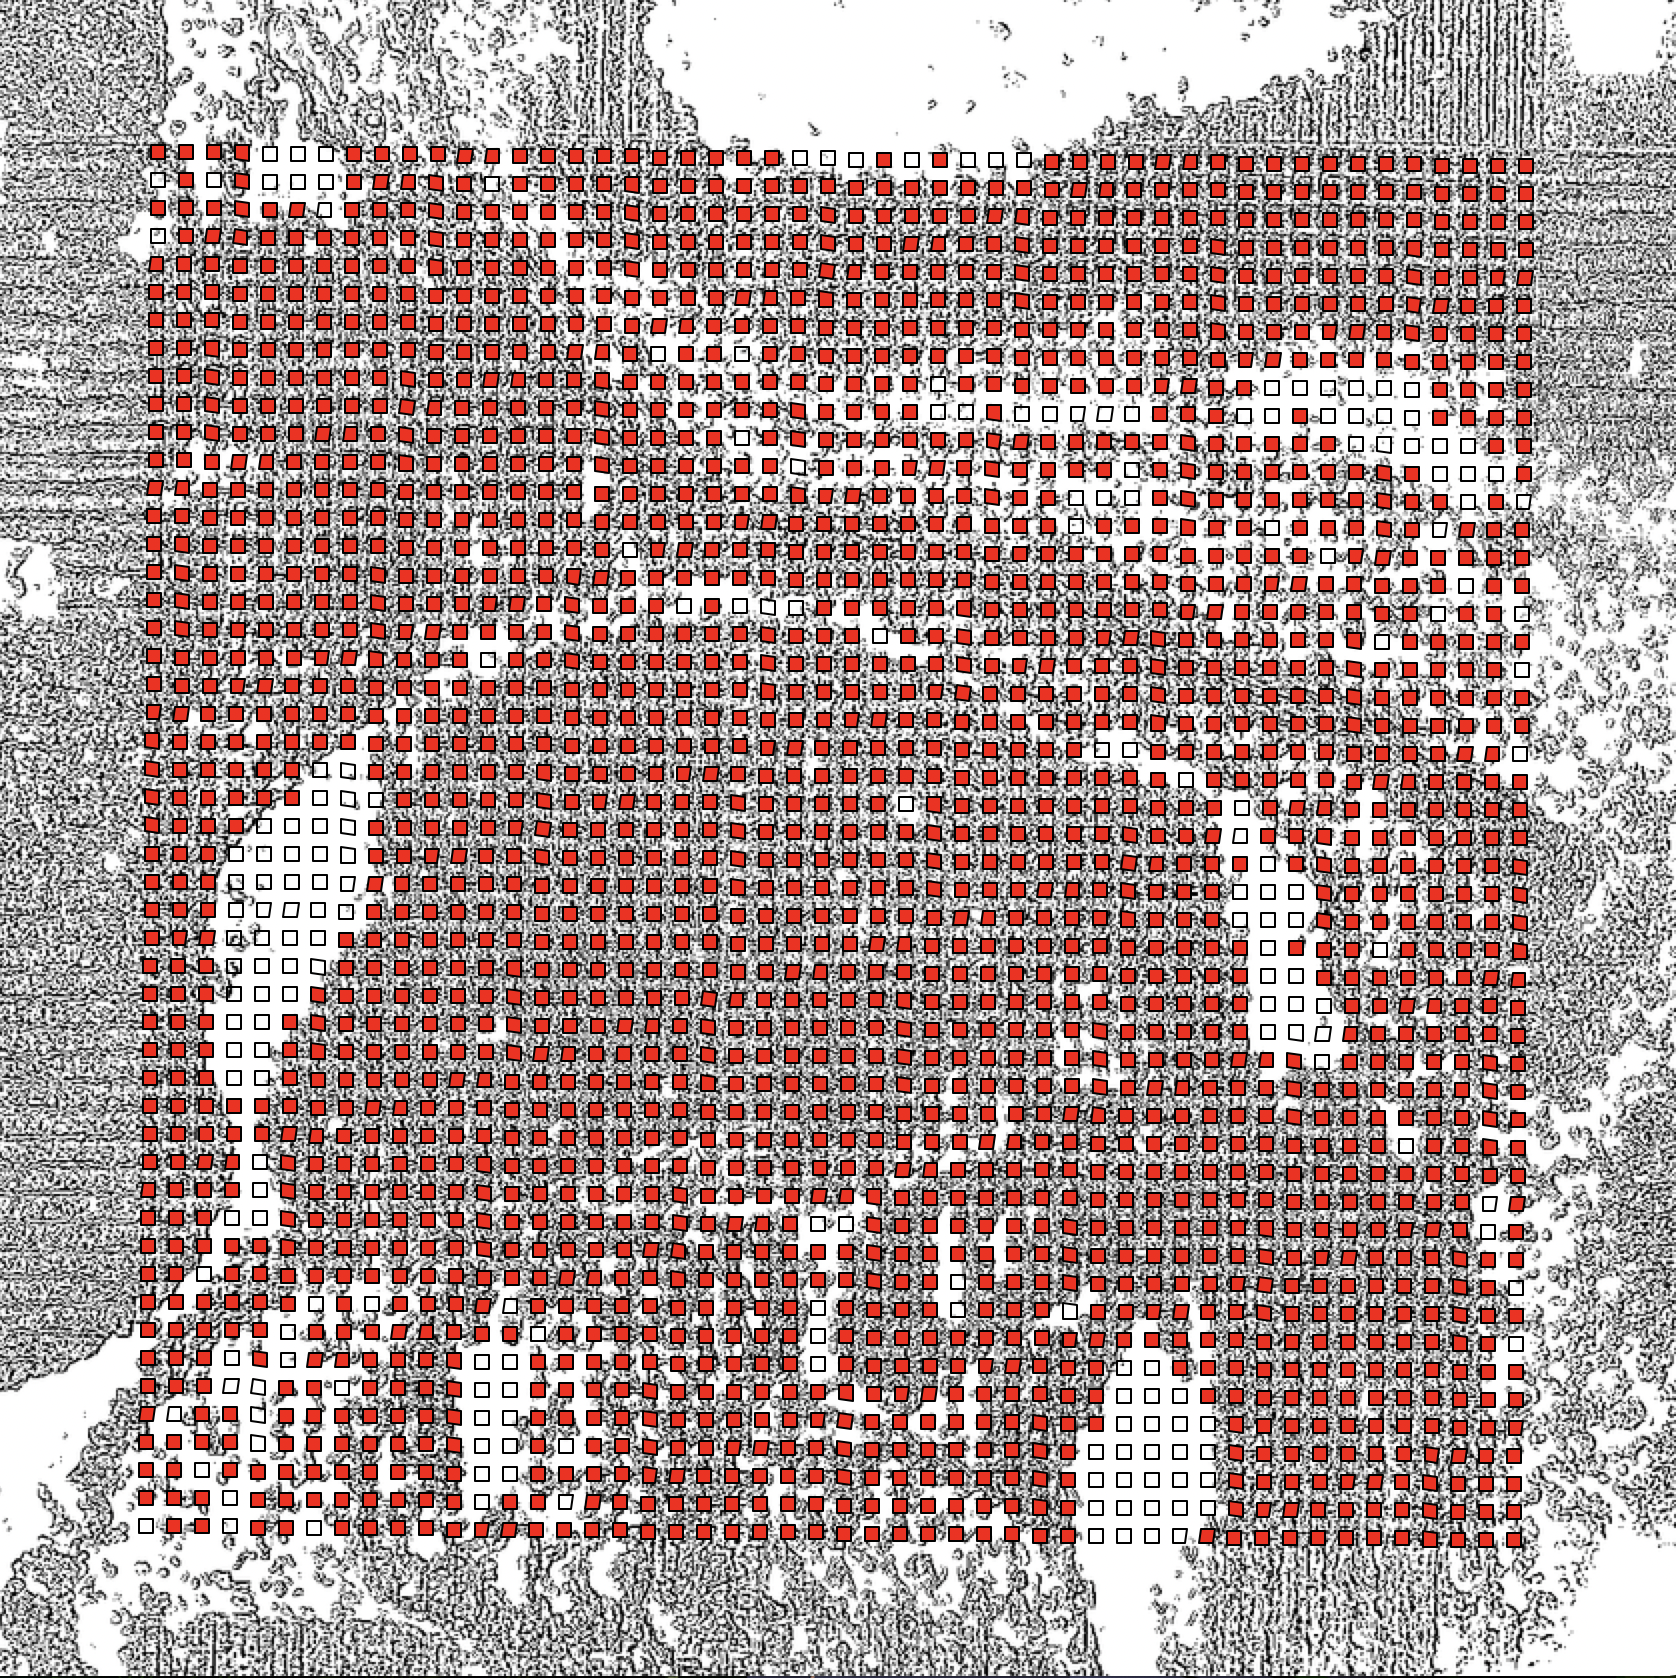
What is currently displayed on the screen are the classifications that AtlasXbrowser made, based on the Adaptive Thresholding step, for which tixels are on top of biological tissue and which are not.
You are now able to review the decisions that AtlasXbrowser made and change them as you see fit. To change the state of the tixels, select one of the options from the list of:
Point (flip) changes the state of whatever tixel is clicked on.
Rectangle (flip) allows for a rectangle to be drawn on screen and flips the state of every tixel contained in that rectangle.
Rectangle (all on) allows for a rectangle to be drawn on screen and turns all tixels contained in this region on.
Rectangle (all off) allows for a rectangle to be drawn on screen and turns all tixels contained in the region off.
Once confident that the coloring of the tixels are accurate, meaning the tixels covering tissue are red, and the tixels not over tissue are clear, select Create Spatial Folder at the bottom of the screen.